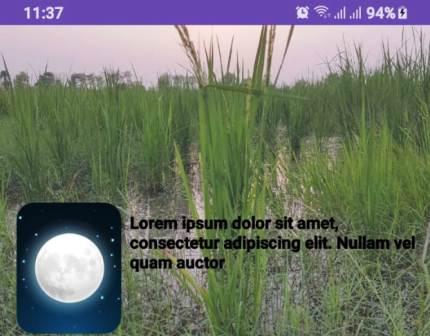
Creating a smooth and engaging user experience is crucial for any Android app. One common UI component that helps achieve this is a Professional Auto-Sliding Layout Slider In Android Java. Perfect for highlighting key features, showcasing products, or creating onboarding screens
🔧 Key Features Implemented
- ✅ ViewPager2-based layout slider
- ✅ Auto-slide every 4 seconds
- ✅ Dot indicators with click support
- ✅ Smooth animations using PageTransformer
- ✅ Fully customizable titles and descriptions
🧩 Complete Code Overview
1. Image Slider Setup
private int[] images = {
R.drawable.image_1,
R.drawable.image_2,
R.drawable.image_3
};
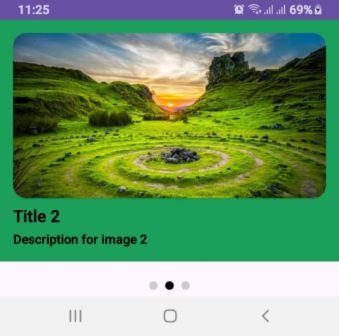
private String[] titles = {"Title 1", "Title 2", "Title 3"};
private String[] descriptions = {
"Description for image 1",
"Description for image 2",
"Description for image 3"
};These arrays hold the images, titles, and descriptions for the slider. You can easily replace them with your own assets or data from an API.
2. ViewPager2 Configuration
viewPager = findViewById(R.id.viewPager);
sliderAdapter = new LayoutSliderAdapter(images, titles, descriptions);
viewPager.setAdapter(sliderAdapter);
viewPager.setPageTransformer(new BookPageTransformer());
The LayoutSliderAdapter binds data to each page. You can use any animation class (like BookPageTransformer) to create swipe effects.
3. Dot Indicator Setup
private void setupDots(int count) {
    for (int i = 0; i < count; i++) {
        ImageView dot = new ImageView(this);
        dot.setImageResource(R.drawable.dot_unselected);
        ...
        dotLayout.addView(dot);
    }
    highlightDot(0);
}
Dots are added dynamically and respond to user interaction, allowing manual slide navigation.
4. Auto-Slide Functionality
private void setupLayoutAutoSlide() {
    slideRunnable = () -> {
        int nextItem = (viewPager.getCurrentItem() + 1) % images.length;
        viewPager.setCurrentItem(nextItem, true);
        slideHandler.postDelayed(slideRunnable, DELAY_IN_MILLI_SEC);
    };
    slideHandler.postDelayed(slideRunnable, DELAY_IN_MILLI_SEC);
}
This function enables the ViewPager2 to auto-slide every 4 seconds using a Handler and Runnable.
Complete Code Classes
1. BookPageTransformer.java
public class BookPageTransformer implements ViewPager2.PageTransformer {

    @Override
    public void transformPage(@NonNull View page, float position) {
        if (position < -1) {
            page.setAlpha(0f);
        } else if (position <= 0) {
            page.setAlpha(1f);
            page.setTranslationX(0f);
            page.setPivotX(page.getWidth());
            page.setRotationY(-90f * Math.abs(position));
        } else if (position <= 1) {
            page.setAlpha(1f);
            page.setTranslationX(0f);
            page.setPivotX(0f);
            page.setRotationY(90f * Math.abs(position));
        } else {
            page.setAlpha(0f);
        }
    }
}
2. LayoutSliderAdapter.java
public class LayoutSliderAdapter extends RecyclerView.Adapter {

    private int[] images;
    private String[] titles;
    private String[] descriptions;
    private int[] colors;

    public LayoutSliderAdapter(int[] images, String[] titles, String[] descriptions) {
        this.images = images;
        this.titles = titles;
        this.descriptions = descriptions;
        colors = new int[]{R.color.col1,R.color.col2,R.color.col3};
    }

    @NonNull
    @Override
    public ViewHolder onCreateViewHolder(@NonNull ViewGroup parent, int viewType) {
        View view = LayoutInflater.from(parent.getContext()).inflate(R.layout.image_slider_item, parent, false);
        return new ViewHolder(view);
    }

    @Override
    public void onBindViewHolder(@NonNull ViewHolder holder, int position) {
        holder.rootItem.setBackgroundColor(ContextCompat.getColor(holder.rootItem.getContext(),colors[position]));
        holder.imageView.setImageResource(images[position]);
        holder.titleTextView.setText(titles[position]);
        holder.descriptionTextView.setText(descriptions[position]);
    }

    @Override
    public int getItemCount() {
        return images.length;
    }

    public static class ViewHolder extends RecyclerView.ViewHolder {
        LinearLayout rootItem;
        ImageView imageView;
        TextView titleTextView;
        TextView descriptionTextView;

        public ViewHolder(@NonNull View itemView) {
            super(itemView);
            rootItem = itemView.findViewById(R.id.rootItem);
            imageView = itemView.findViewById(R.id.imageView);
            titleTextView = itemView.findViewById(R.id.titleTextView);
            descriptionTextView = itemView.findViewById(R.id.descriptionTextView);
        }
    }
}
3. ZoomOutPageTransformer.java
package com.alsaeed.imageslider;

import android.view.View;

import androidx.annotation.NonNull;
import androidx.viewpager2.widget.ViewPager2;

public class ZoomOutPageTransformer implements ViewPager2.PageTransformer {

    private static final float MIN_SCALE = 0.85f;
    private static final float MIN_ALPHA = 0.5f;

    @Override
    public void transformPage(@NonNull View page, float position) {
        if (position < -1) {
            page.setAlpha(0f);
        } else if (position <= 1) {
            // Scale the page
            float scaleFactor = Math.max(MIN_SCALE, 1 - Math.abs(position));
            float vertMargin = page.getHeight() * (1 - scaleFactor) / 2;
            float horzMargin = page.getWidth() * (1 - scaleFactor) / 2;
            if (position < 0) {
                page.setTranslationX(horzMargin - vertMargin / 2);
            } else {
                page.setTranslationX(-horzMargin + vertMargin / 2);
            }

            // Scale and fade
            page.setScaleX(scaleFactor);
            page.setScaleY(scaleFactor);
            page.setAlpha(MIN_ALPHA + (scaleFactor - MIN_SCALE) / (1 - MIN_SCALE) * (1 - MIN_ALPHA));
        } else {
            page.setAlpha(0f);
        }
    }
}
4. MainActivity.java
public class MainActivity extends AppCompatActivity {

    private ViewPager2 viewPager;
    private LinearLayout dotLayout;
    private final static int DELAY_IN_MILLI_SEC = 4000;

    private int[] images = {
            R.drawable.image_1,
            R.drawable.image_2,
            R.drawable.image_3
    }; // Replace with your images
    private String[] titles = {"Title 1", "Title 2", "Title 3"};
    private String[] descriptions = {
            "Description for image 1",
            "Description for image 2",
            "Description for image 3"
    };

    private LayoutSliderAdapter sliderAdapter;
    private Handler slideHandler;
    private Runnable slideRunnable;

    @Override
    protected void onCreate(Bundle savedInstanceState) {
        super.onCreate(savedInstanceState);
        setContentView(R.layout.activity_main);

        viewPager = findViewById(R.id.viewPager);
        dotLayout = findViewById(R.id.dotSignLayout);

        // Set Adapter for ViewPager2
        sliderAdapter = new LayoutSliderAdapter(images, titles, descriptions);
        viewPager.setAdapter(sliderAdapter);

        // Add PageTransformer for animations
        viewPager.setPageTransformer(new BookPageTransformer());

        // Initialize Dots
        setupDots(images.length);

        // Highlight Dot on Page Change
        viewPager.registerOnPageChangeCallback(new ViewPager2.OnPageChangeCallback() {
            @Override
            public void onPageSelected(int position) {
                highlightDot(position);
            }
        });

        // Auto-Slide Functionality
        slideHandler = new Handler(Looper.getMainLooper());
        setupLayoutAutoSlide();
    }

    private void setupDots(int count) {
        for (int i = 0; i < count; i++) { ImageView dot = new ImageView(this); dot.setImageResource(R.drawable.dot_unselected); // Default dot drawable LinearLayout.LayoutParams params = new LinearLayout.LayoutParams( LinearLayout.LayoutParams.WRAP_CONTENT, LinearLayout.LayoutParams.WRAP_CONTENT ); params.setMargins(8, 0, 8, 0); dot.setLayoutParams(params); final int index = i; dot.setOnClickListener(v -> {
                viewPager.setCurrentItem(index);
                resetAutoSlide();
            });

            dotLayout.addView(dot);
        }

        highlightDot(0);
    }

    private void highlightDot(int position) {
        for (int i = 0; i < dotLayout.getChildCount(); i++) {
            ImageView dotIv = (ImageView) dotLayout.getChildAt(i);
            if (i == position) {
                dotIv.setImageResource(R.drawable.dot_selected);
            } else {
                dotIv.setImageResource(R.drawable.dot_unselected);
            }
        }
    }

    private void setupLayoutAutoSlide() {
        slideRunnable = new Runnable() {
            @Override
            public void run() {
                int nextItem = (viewPager.getCurrentItem() + 1) % images.length;
                viewPager.setCurrentItem(nextItem, true);
                slideHandler.postDelayed(this, DELAY_IN_MILLI_SEC);
            }
        };
        slideHandler.postDelayed(slideRunnable, DELAY_IN_MILLI_SEC);
    }

    private void resetAutoSlide() {
        slideHandler.removeCallbacks(slideRunnable);
        slideHandler.postDelayed(slideRunnable, DELAY_IN_MILLI_SEC);
    }

    @Override
    protected void onDestroy() {
        super.onDestroy();
        slideHandler.removeCallbacks(slideRunnable);
    }
}
5. activity_main.xml
<?xml version="1.0" encoding="utf-8"?>
<androidx.constraintlayout.widget.ConstraintLayout xmlns:android="http://schemas.android.com/apk/res/android"
    xmlns:app="http://schemas.android.com/apk/res-auto"
    xmlns:tools="http://schemas.android.com/tools"
    android:layout_width="match_parent"
    android:layout_height="match_parent"
    tools:context=".MainActivity">

    <!-- ViewPager2 for Image Slider -->
    <androidx.viewpager2.widget.ViewPager2
        android:id="@+id/viewPager"
        android:layout_width="match_parent"
        android:layout_height="0dp"
        app:layout_constraintBottom_toTopOf="@+id/dotSignLayout"
        app:layout_constraintEnd_toEndOf="parent"
        app:layout_constraintStart_toStartOf="parent"
        app:layout_constraintTop_toTopOf="parent" />

    <!-- Dots Indicator -->
    <LinearLayout
        android:id="@+id/dotSignLayout"
        android:layout_width="wrap_content"
        android:layout_height="wrap_content"
        android:layout_marginTop="16dp"
        android:gravity="center"
        android:orientation="horizontal"
        android:padding="8dp"
        app:layout_constraintBottom_toBottomOf="parent"
        app:layout_constraintEnd_toEndOf="parent"
        app:layout_constraintStart_toStartOf="parent"
        app:layout_constraintTop_toBottomOf="@id/viewPager" />

</androidx.constraintlayout.widget.ConstraintLayout>
6. image_slider_item
<LinearLayout xmlns:android="http://schemas.android.com/apk/res/android"
    xmlns:app="http://schemas.android.com/apk/res-auto"
    android:id="@+id/rootItem"
    android:layout_width="match_parent"
    android:layout_height="match_parent"
    android:background="@color/white"
    android:orientation="vertical"
    android:padding="16dp">

    <androidx.cardview.widget.CardView
        android:layout_width="match_parent"
        android:layout_height="200dp"
        app:cardCornerRadius="16dp">

        <ImageView
            android:id="@+id/imageView"
            android:layout_width="match_parent"
            android:layout_height="200dp"
            android:scaleType="centerCrop"
            android:src="@drawable/image_1" />

    </androidx.cardview.widget.CardView>

    <TextView
        android:id="@+id/titleTextView"
        android:layout_width="wrap_content"
        android:layout_height="wrap_content"
        android:layout_marginTop="8dp"
        android:text="Title"
        android:textColor="@color/black"
        android:textSize="18sp" />

    <TextView
        android:id="@+id/descriptionTextView"
        android:layout_width="wrap_content"
        android:layout_height="wrap_content"
        android:layout_marginTop="4dp"
        android:text="Description"
        android:textColor="@color/black"
        android:textSize="14sp" />

</LinearLayout>
🛠 Tips for Customization
- ✅ Add fade-in or zoom animations for enhanced UX
- ✅ Replace static arrays with dynamic content from Firebase or REST API
- ✅ Use MotionLayout for more advanced transitions
- ✅ Customize the dot shapes and colors for better brand alignment
🚀 Final Thoughts
Using ViewPager2 with auto-scroll and dot indicators is a powerful way to deliver interactive, modern UI components in your Android app. Whether for onboarding, promotional banners, or product showcases, this slider structure is flexible, reusable, and production-ready.